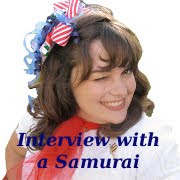
For many weeks I have been agonizing over my hair. Really, the amount of time I spent thinking about my hair was bordering on very vain. In my defense there were some big decisions to be made. I have spent the last 3 years growing my hair out and I was still about 2 inches from my goal but my hair was not working for me. My curls were starting to look lank and ringlet-y and my straight hair seemed to be weighing me down visually. I found myself wearing a ponytail every day and I wasn't completely happy with that either. I thought about taking a before picture but I was so blah about it I didn't even bother.
The good things about the very long hair were some killer beehives and really being able to work the Bump-it.
Something needed to happen, either keep the long hair and get some layers and movement or go a head and really cut it.
I compiled a file of hair pictures I liked. It had Jennifer Love Hewitt, Elizabeth Taylor, Rita Hayworth, a late 70's early 80's do that looked just like one my mom had, and was very heavy on the classic Grace Kelly. I printed it out and took myself to JoeAnn, my stylist, whom I have neglected for 2 years.
We decided to go halvsies between what I had and the Grace Kelly/Elizabeth Taylor and ended up with the Rita Hayworth.
Here it is flat ironed fresh from the salon:
So far (29 hours later) I am very happy with it. Last night I learned that I need a better curling iron and that it is very cute with the ends curled under or flipped up.
And here it is, today, curled with my rag curlers.
I posted this on Facebook today and the people went wild. I must say Thank You! It feels great to have so many compliments in one day.
Jenni and Theresa wanted details on how I do my rag curls and so I give you a very mini tutorial on how I make my "rags".
If you want a tutorial on how to use the rag curls go here.
I generally tie mine close to the head for more of a naturally curly look but with this new length I will probably try tying them lower on occasion. I use mousse before I roll as a setting lotion. ( JoeAnn advises rolling the hair in opposite directions do that the curls "collide" but I never remember to do that when I roll them and after 18 months of doing it twice a week I don't know if I can break the habit.) I also use end wraps. If you have ever had a perm you will recognize these. They keep the ends of my hair together when I roll them and prevent the ends from being messy little balls of frizz. I got mine at Sally. I just get a section of hair and fold the paper over the ends and then roll the hair on the rag.
My rags aren't rags but 3/4" wide turned strips with finished edges. I do this because in the past when I used rags for rollers the strings would get tangled up and knotted in my hair. It was painful. If I were to make these again I would make them 1" to 1 1/2" finished.
Figure out how wide you need to cut your fabric to make them the desired with doubled plus 1/2" for a 1/4" seam allowance.
Then cut a strip that wide the width of the fabric.
Next, sew the strip length wise with a 1/4" seam making a long tube then turn and press. This is where a loop turner or similar tool is very useful.
Then cut the rags to 11" or 12" strips mine are 11" because then I could get 4 out of a 44" with fabric.
Zig-zag the edges.
I am looking forward to all of the fun I can have with this hair length. I am excited for my bangs to grow out. They were very good bangs and I enjoyed every minute of them but not one of my inspiration pictures had fringe.
I am also excited to try out all of the fun tutorials I found at Berlin Hair Baby. This one first, then maybe will I be kissed by Cary Grant.


1 comment:
I don't know if you like 1928 stuff, but they just posted on fb yesterday that they came out with a whole new line of hair accessories. (I realize the 20's are more my decade and the 40's yours, but I thought maybe you'd enjoy some of the pretty vintage-y stuff there.) View hair accessories here:
http://www.1928.com/vintage-fashion-accessories/vintage-inspired-hair-accessories.html?limit=all
Post a Comment